
 Do you live on an isolated property with the sole source of water being a well? If so, you know the importance of having a dependable and fully functioning well pump to provide clean, potable water. But what happens when your pump fails or needs repair? What do you need to know in order to get it back up and running again? In this blog post, Wildheron Drilling experts will explore how to diagnose and repair common issues with well pumps, both large commercial units as well as smaller residential models. From understanding how they work and diagnosing problems through plan selection and installation instructions, this is your complete guide for getting your water pumping again!
Gather the appropriate tools and materials for the well pump repair
When it comes to repairing something, having the right tools and materials at your disposal is crucial. Without them, you’ll find yourself running back and forth to the store, making it difficult to get the job done efficiently. To gather the appropriate tools and materials for the repair, take inventory of what you already have and then make a list of what you need.
The most important tool needed to repair a well pump is the right-sized wrench set, as this will allow you to access components and make any adjustments that may be necessary in order to get the job done. You’ll also need a voltmeter or multimeter to check for proper power flow and voltage, pliers for loosening or tightening connections and clamps, a bucket to collect any liquids that may escape during the repair process, wire cutters for splicing wires or cutting them off completely, and a few other items depending on the specific problem you are addressing.
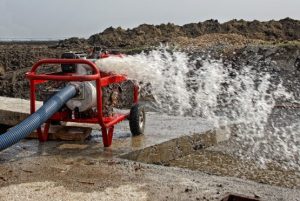
Perform an inspection and diagnosis of the well pump
Before making any repairs to your well pump, it’s important to perform a thorough inspection and diagnosis in order to identify the exact cause of the issue. If there is no visible damage or obvious signs of wear and tear, then a diagnostic test may be necessary. This will involve running a series of tests on electrical components such as relays, switches, and wires to make sure everything is functioning properly. Additionally, a pressure test should be performed in order to check the actual pump performance.

Shut off power to the pump and open the pressure tank
Once you’ve identified the issue and gathered the necessary tools and materials, you are ready to begin the repair process. Before doing anything else, however, it is important to shut off the power to the pump in order to prevent any electric shock or other hazards. After that, open up the pressure tank so that you can access all of the components inside.
Unscrew any bolts or screws that are holding the pump together
Once you have the pressure tank open, unscrew any bolts or screws that are holding the pump together in order to gain access to all of its parts. Make sure that you keep track of where each one goes as this will save you time and energy when it comes time to reassemble the unit.
Clean off any dirt, rust, or sediment from the pump
Nothing is worse than a malfunctioning pump, especially when it’s due to dirt, rust, or sediment buildup. Luckily, taking the time to clean off any of these intruders from your pump can save you from unnecessary headaches down the line. Don’t let these unwanted culprits damage your pump’s ability to perform at its best. With just a little bit of elbow grease, you can easily remove anything that’s getting in the way and get your pump back to its peak efficiency.
Replace any malfunctioning components and get the well pump back up and running
Once you’ve identified the problem, it’s time to begin repairs. If a certain component or part has malfunctioned and needs to be replaced, make sure to find a high-quality replacement that is specifically designed for your particular model. After the new parts have been installed and all Connections have been checked and tightened, it’s time to get the well pump up and running again. Make sure to follow all relevant safety instructions while testing for proper performance, and if you encounter any issues then consider consulting with a professional who can better assist you.
If your well is not functioning properly and then in many cases, the well pump is the culprit. Read this guide regarding well repair https://wildherondrilling.com/well-repair-what-to-do/
After following these steps, your well pump should once again be functioning properly and running smoothly. It’s important to remember that any repairs done to a well pump require the proper tools and materials, so it may help to speak with an expert such as WildHeron Drilling in order to ensure you have everything you need before beginning the process. However, with a little effort and care, you can bring your well pump back to life- regardless of whether it is an old workhorse or a newfangled modern marvel.